Blogging Challenge #3 (day late) A Tutorial
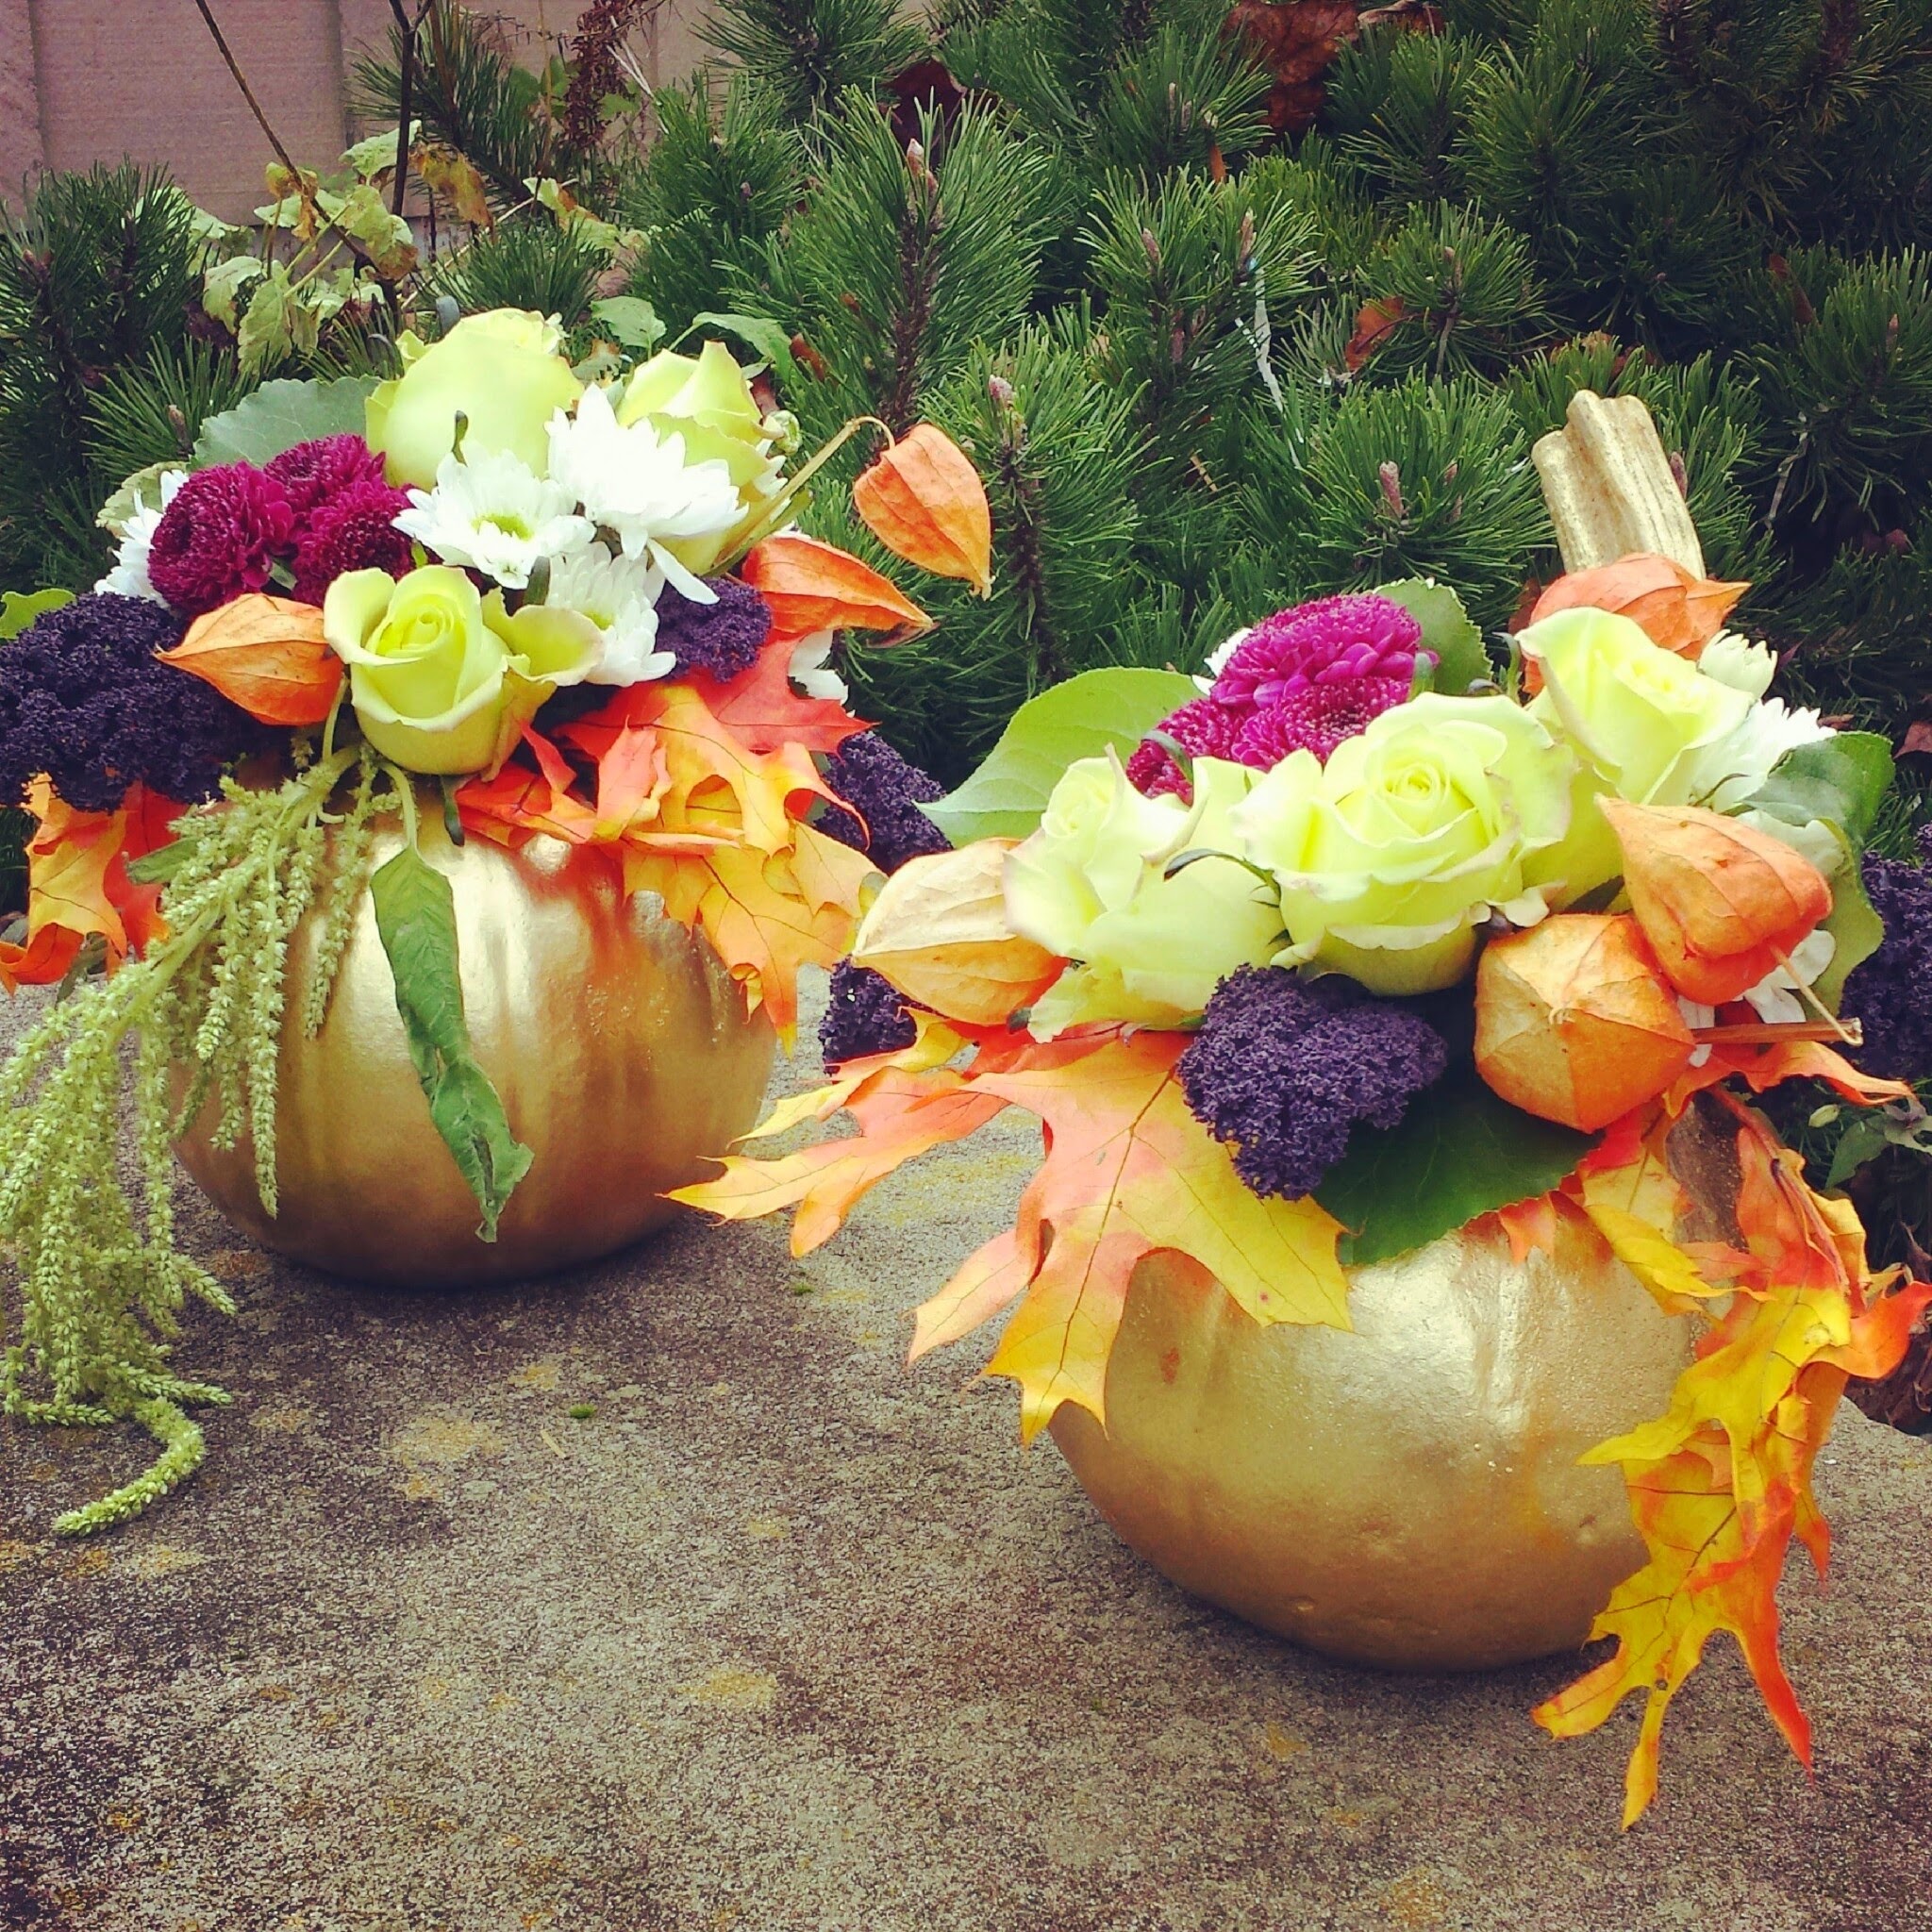
Hey there! Welcome to my day #3 of my Alex Beadon's blogging challenge! Today (well, actually yesterday...but I was stumped and very tired.) I thought about what to post...I thought well, maybe a boutonniere or wearable flowers how to? Naw, maybe that'll be coming up soon. I Decided to go with my fall gilded pumpkin arrangement! It got a ton of action on facebook when I just posted the picture. So, it must be popular right? I think it's great doing them in gold or copper so they work for all of fall and not just Halloween. Oooh, and Design Master has a new color out ROSE GOLD. It's sooooo purdy!

Anyways, I'm getting a bit too excited about paint. Back to the tutorial!
To Make These You Will Need The Following:
1. pumpkin or (s) depending how many you wanna do.
2. tools you usually use to clean pumpkins. Knife, and scooping spoon.
3. your choice in colored spray paint.
4. some skewers (kebob sticks work well)
5. pam or some sort of spray cooking oil.
6. a mixed bouquet of flowers.
7. floral foam or a jar that will fit inside of your pumpkin.
Alrighty, your first step is to clean out the pumpkin. Make sure to get all the guts and seeds out and scrape it as clean as you can get it. The cleaner it is the longer the pumpkin will last. But since it will be indoors, you can expect to get a week tops from this arrangement since the pumpkin is carved. Unless, your house is a bit colder. Then it may vary. But, just to remind anyone...don't place this arrangement on something like a super expensive wood table or other furniture pieces you don't want any marks on. I suggest a clear dish or even some cellophane under it if you must place it on a wooden surface. ***Living pumpkins will possibly leak or become a bit soft or fuzzy at the end of their lives.
Save the top to place back on the pumpkin.
Next you should take your pumpkin on the porch or someplace you will not get into trouble with painting with spray paint. And paint that pumpkin. If you want to make sure you get the bottom, just do it after the rest of it dries. I usually don't really bother since it's the bottom anyways. After it is all dry, bring it back inside. And then spray the inside of the pumpkin with your Pam or spray cooking oil. This will help the pumpkin last a little longer indoors.
Then you can either cut your wet floral foam (please use instruction on soaking foam from the directions on the foam) to fit inside or place a vase of water inside the pumpkin. Add your flowers. Making sure if you have them in a vase to cut the stems at an angle so they can drink easier, and remove all leaves that will be in the water.
To finish off the pumpkin I take the skewers (about 4 or 2 cut into 4) and poke them into the top of the pumpkin and then place the top just off to the side. Poking the skewers through so that it is affixed to the pumpkin.
Hope you enjoy making this fun fall centerpiece! Let me know how your pumpkin turns out. :-)
Gina